
Содержание
Shaker Prime
Snack vending machine
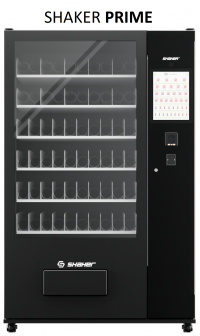
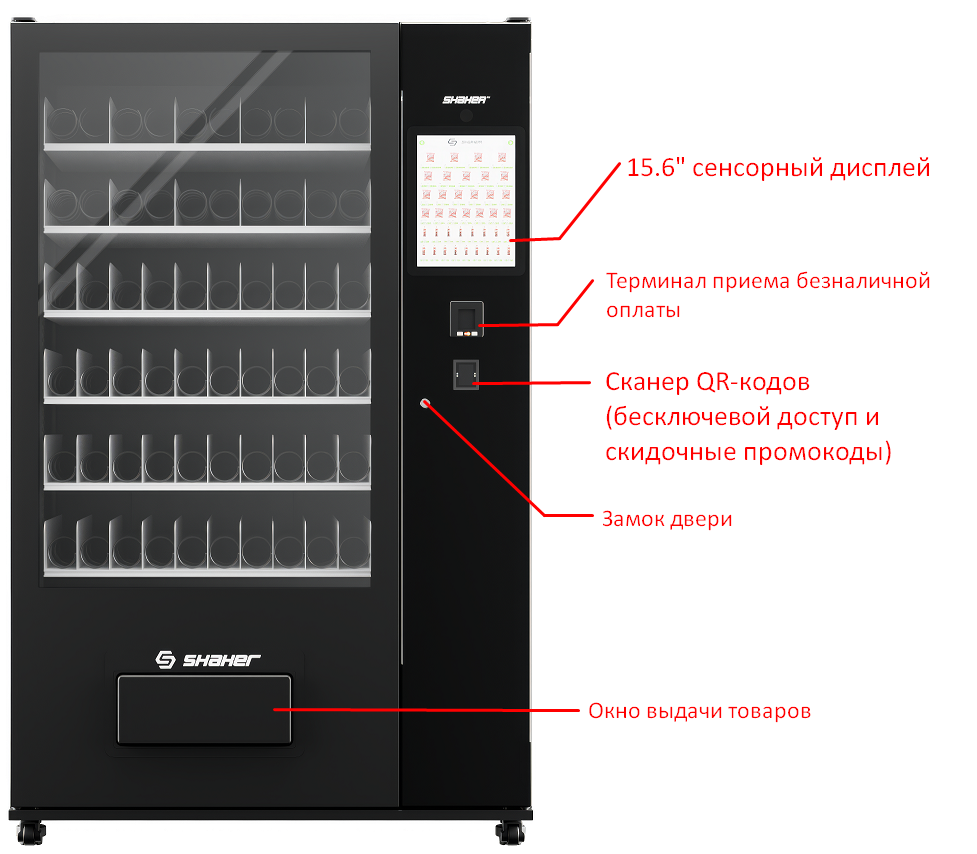
Main Features
- Dimensions: 875x1200x1930 mm L-W-H;
- Weight: 300 kg (empty);
- Power supply: 220-230 V, standby consumption 40W, peak consumption 520W;
- Number of shelves and cells: 6×10;
- Delivery type: spiral/conveyor;
- Payment systems: MDB device support;
- Control: touch screen.
- Freon type: R134A, requires about 320g for purging and refilling.
Preparing to launch
- Remove the transport packaging of the vending machine.
- The door key is fixed on a pallet inside the goods delivery compartment. Open the narrow door with the key, then open the door of the goods chamber.
- Remove the transport ties from both sides of the product shelves. Check the free movement of the shelves.
- Remove and screw the WI-FI antenna to the SMA connector.
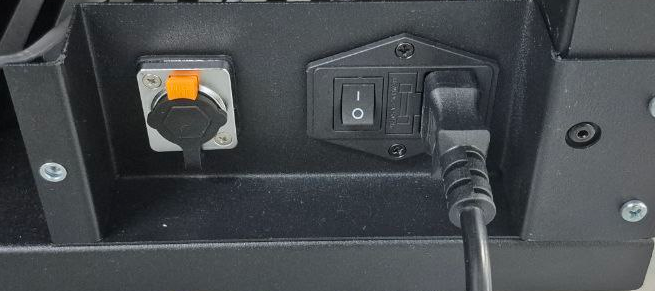
- Remove and connect the power cable to the outlet of the machine.
⚠️IMPORTANT! Shipping packaging is not intended for long-term storage. When storing the machine, the packaging must be removed.
Installing and starting the machine
When placing the machine, it is necessary to leave at least 10 cm of free space from the back wall of the machine for the heat sink of the compressor unit. It is prohibited to operate the machine without legs / wheels installed in a niche, without free air circulation from the rear of the machine.
Connect the power cable to the outlet on the back of the machine and turn the button to the «I» position. Inside the vending machine on the lower shelf, move vending machines to the upper position. Wait for the PC to boot up and trade matrix to appear on the display. To access the machine's settings menu, press the upper-right corner of the display 5 times.
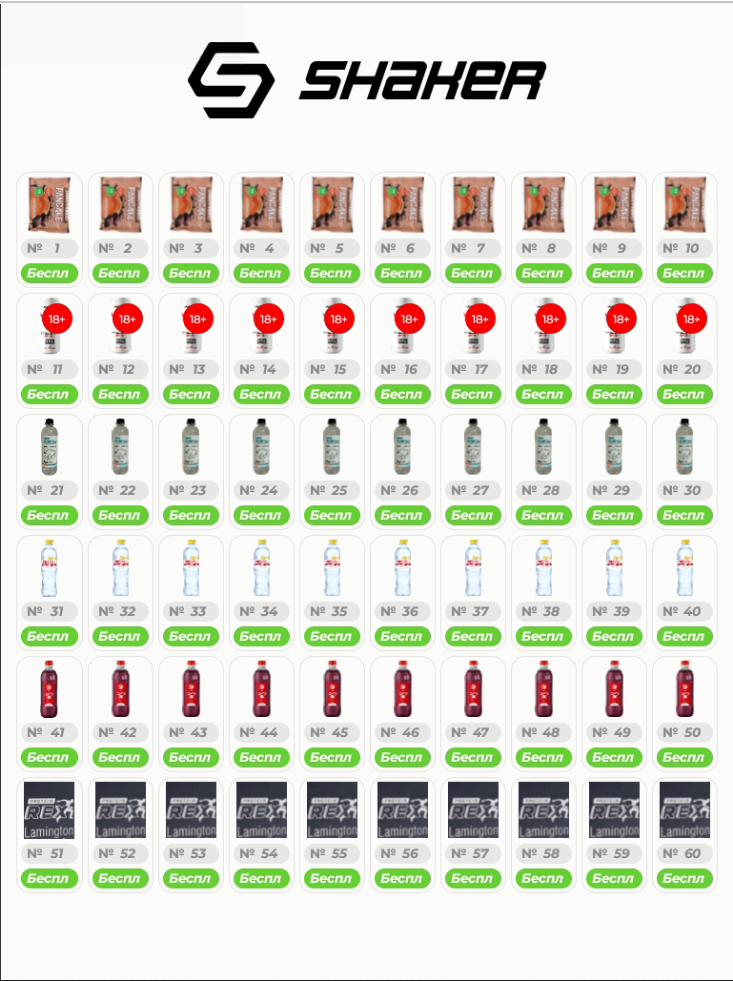
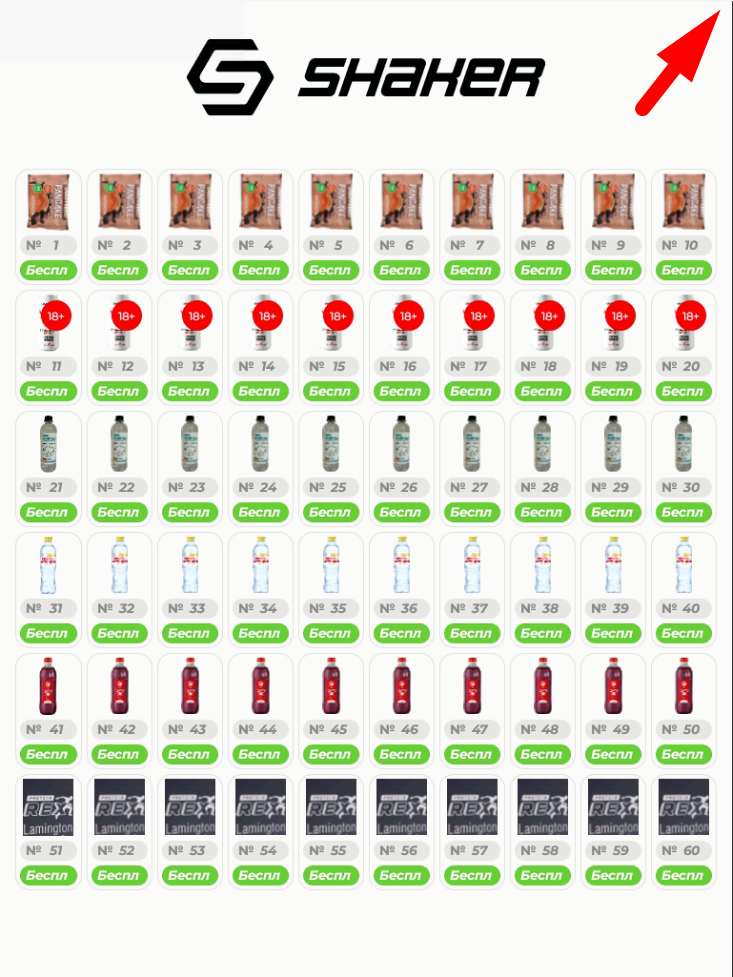
Service menu and access settings
To access the machine's settings menu, press the upper-right corner of the display 5 times. Request from Shaker technical support the password for accessing the service menu of the machine settings. When you first enter the service menu, the system will prompt you to replace the default password with a new one.
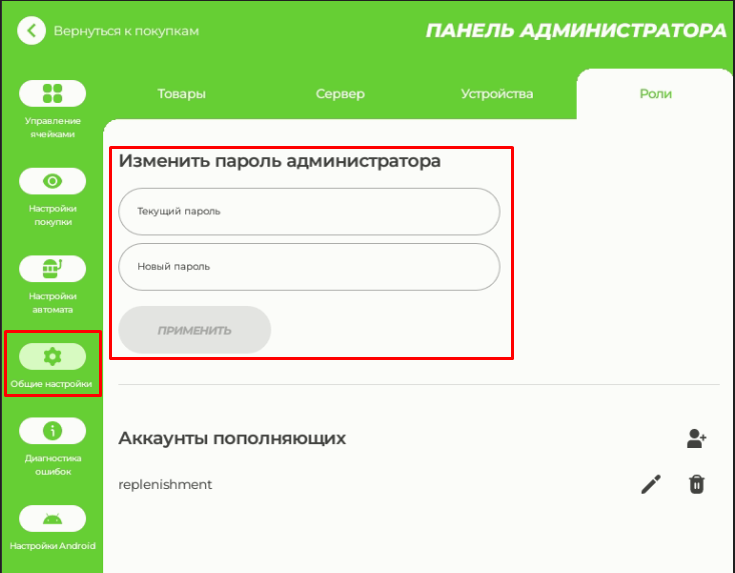
Changing the administrator password
In the sidebar, select the section "General settings" - "Roles", enter the new administrator password twice and click «Change». After restarting the application, log in with a new password.
Adding, changing and deleting replenishment accounts
Select the «General Settings» - «Roles» section in the sidebar and use the icons for add, edit or delete replenishment accounts.
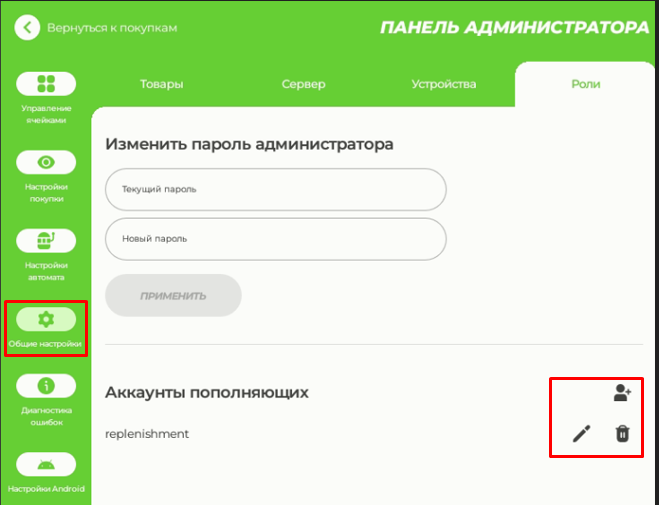
Adding, changing and deleting replenishment accounts
Select the «General Settings» - «Roles» section in the sidebar and use the icons for add, edit or delete replenishment accounts.
Diagnostics of mechanics
Cell test
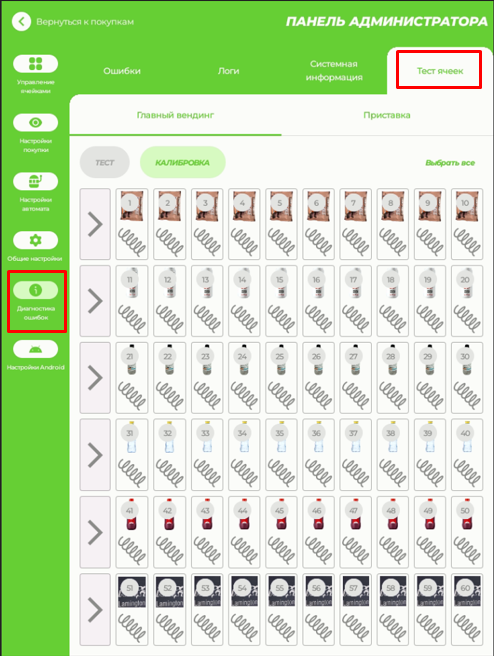
Open the section "Error diagnosis" - "Cell test". To test any individual cell, select it on the matrix and click «Test». To check the operation of all cells, click «Select all» and click «Test». In this mode, the machine checks the operation of the cell motor with the optosensor turned on - if there are no goods, an issue error will appear on each cell (if the issue sensor is turned on). You don't need to pay attention to this yet - just make sure that all cells work out the output cycle correctly.
Calibration of motors
The cell motors are calibrated in case of failure of the starting and ending points of the motor position.
Open the section "Error diagnosis" - "Cell test". Select the desired or all cells, click «Calibration». After the motor is running, set the cell spring to the correct position. Repeat the calibration of the cell and the adjustment of the spring position until the goods are delivered normally.
Adjusting the spring position
For the correct operation of the output, the following positioning of the springs is used, depending on their purpose:
- Spring for 10 and 14 products (small/medium snacks) - position on 90 degrees to the left;
- Spring for 5 products (bottles) - position on 90 degrees to the right.
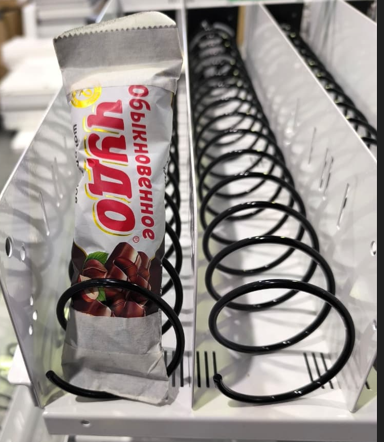
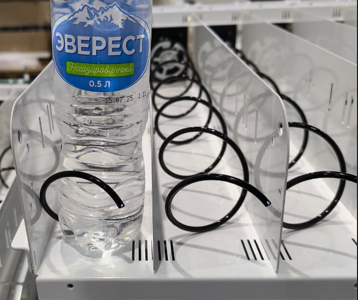
To adjust the position, pull out the shelf, grasp the spring locking wheel. Pull it towards you along with the spring and turn it into the desired position. Carefully release the wheel.
Configuration of shelves and cells
Open the section "Cell Management" - "Cell configuration". Select one or more cells and use the tools to merge, disconnect, or change the type or size of cells. The configuration of the shelves changes automatically - if there is or is not a physical connection of the wiring harness to the shelf. To change the cell capacity, go to the "Cell management" - "Depth".
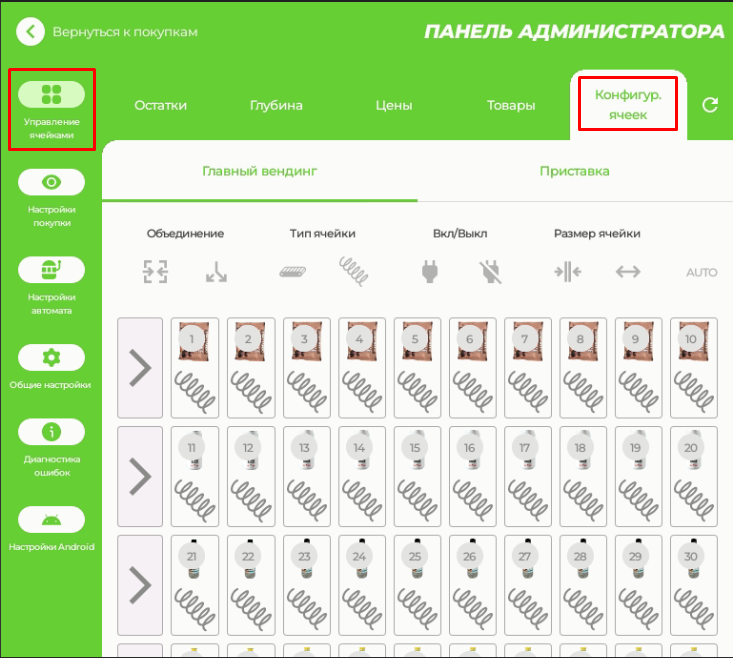

To change the number, height of the shelves and replace the springs, refer to the manual Reconfiguration of the Shaker Prime shelves
Working with "Honest Sign"
Work with this category of goods is available through the withdrawal of goods from circulation due to sale through a vending machine. You can read more about Honest Sign's work. https://markirovka.ru/knowledge/tovarnye-gruppy/bezalcohol-napitki/prodazhi-cherez-torgovye-vendingovye-avtomaty-bezalkogolnye-napitki/здесь , for settings from the Vendista side, refer to manual.
Product database
Adding products consists of 3 stages:
- Preparation of product images;
- Adding new products in the personal account of telemetry;
- Uploading the product database file to the vending machine.
Preparation of product images
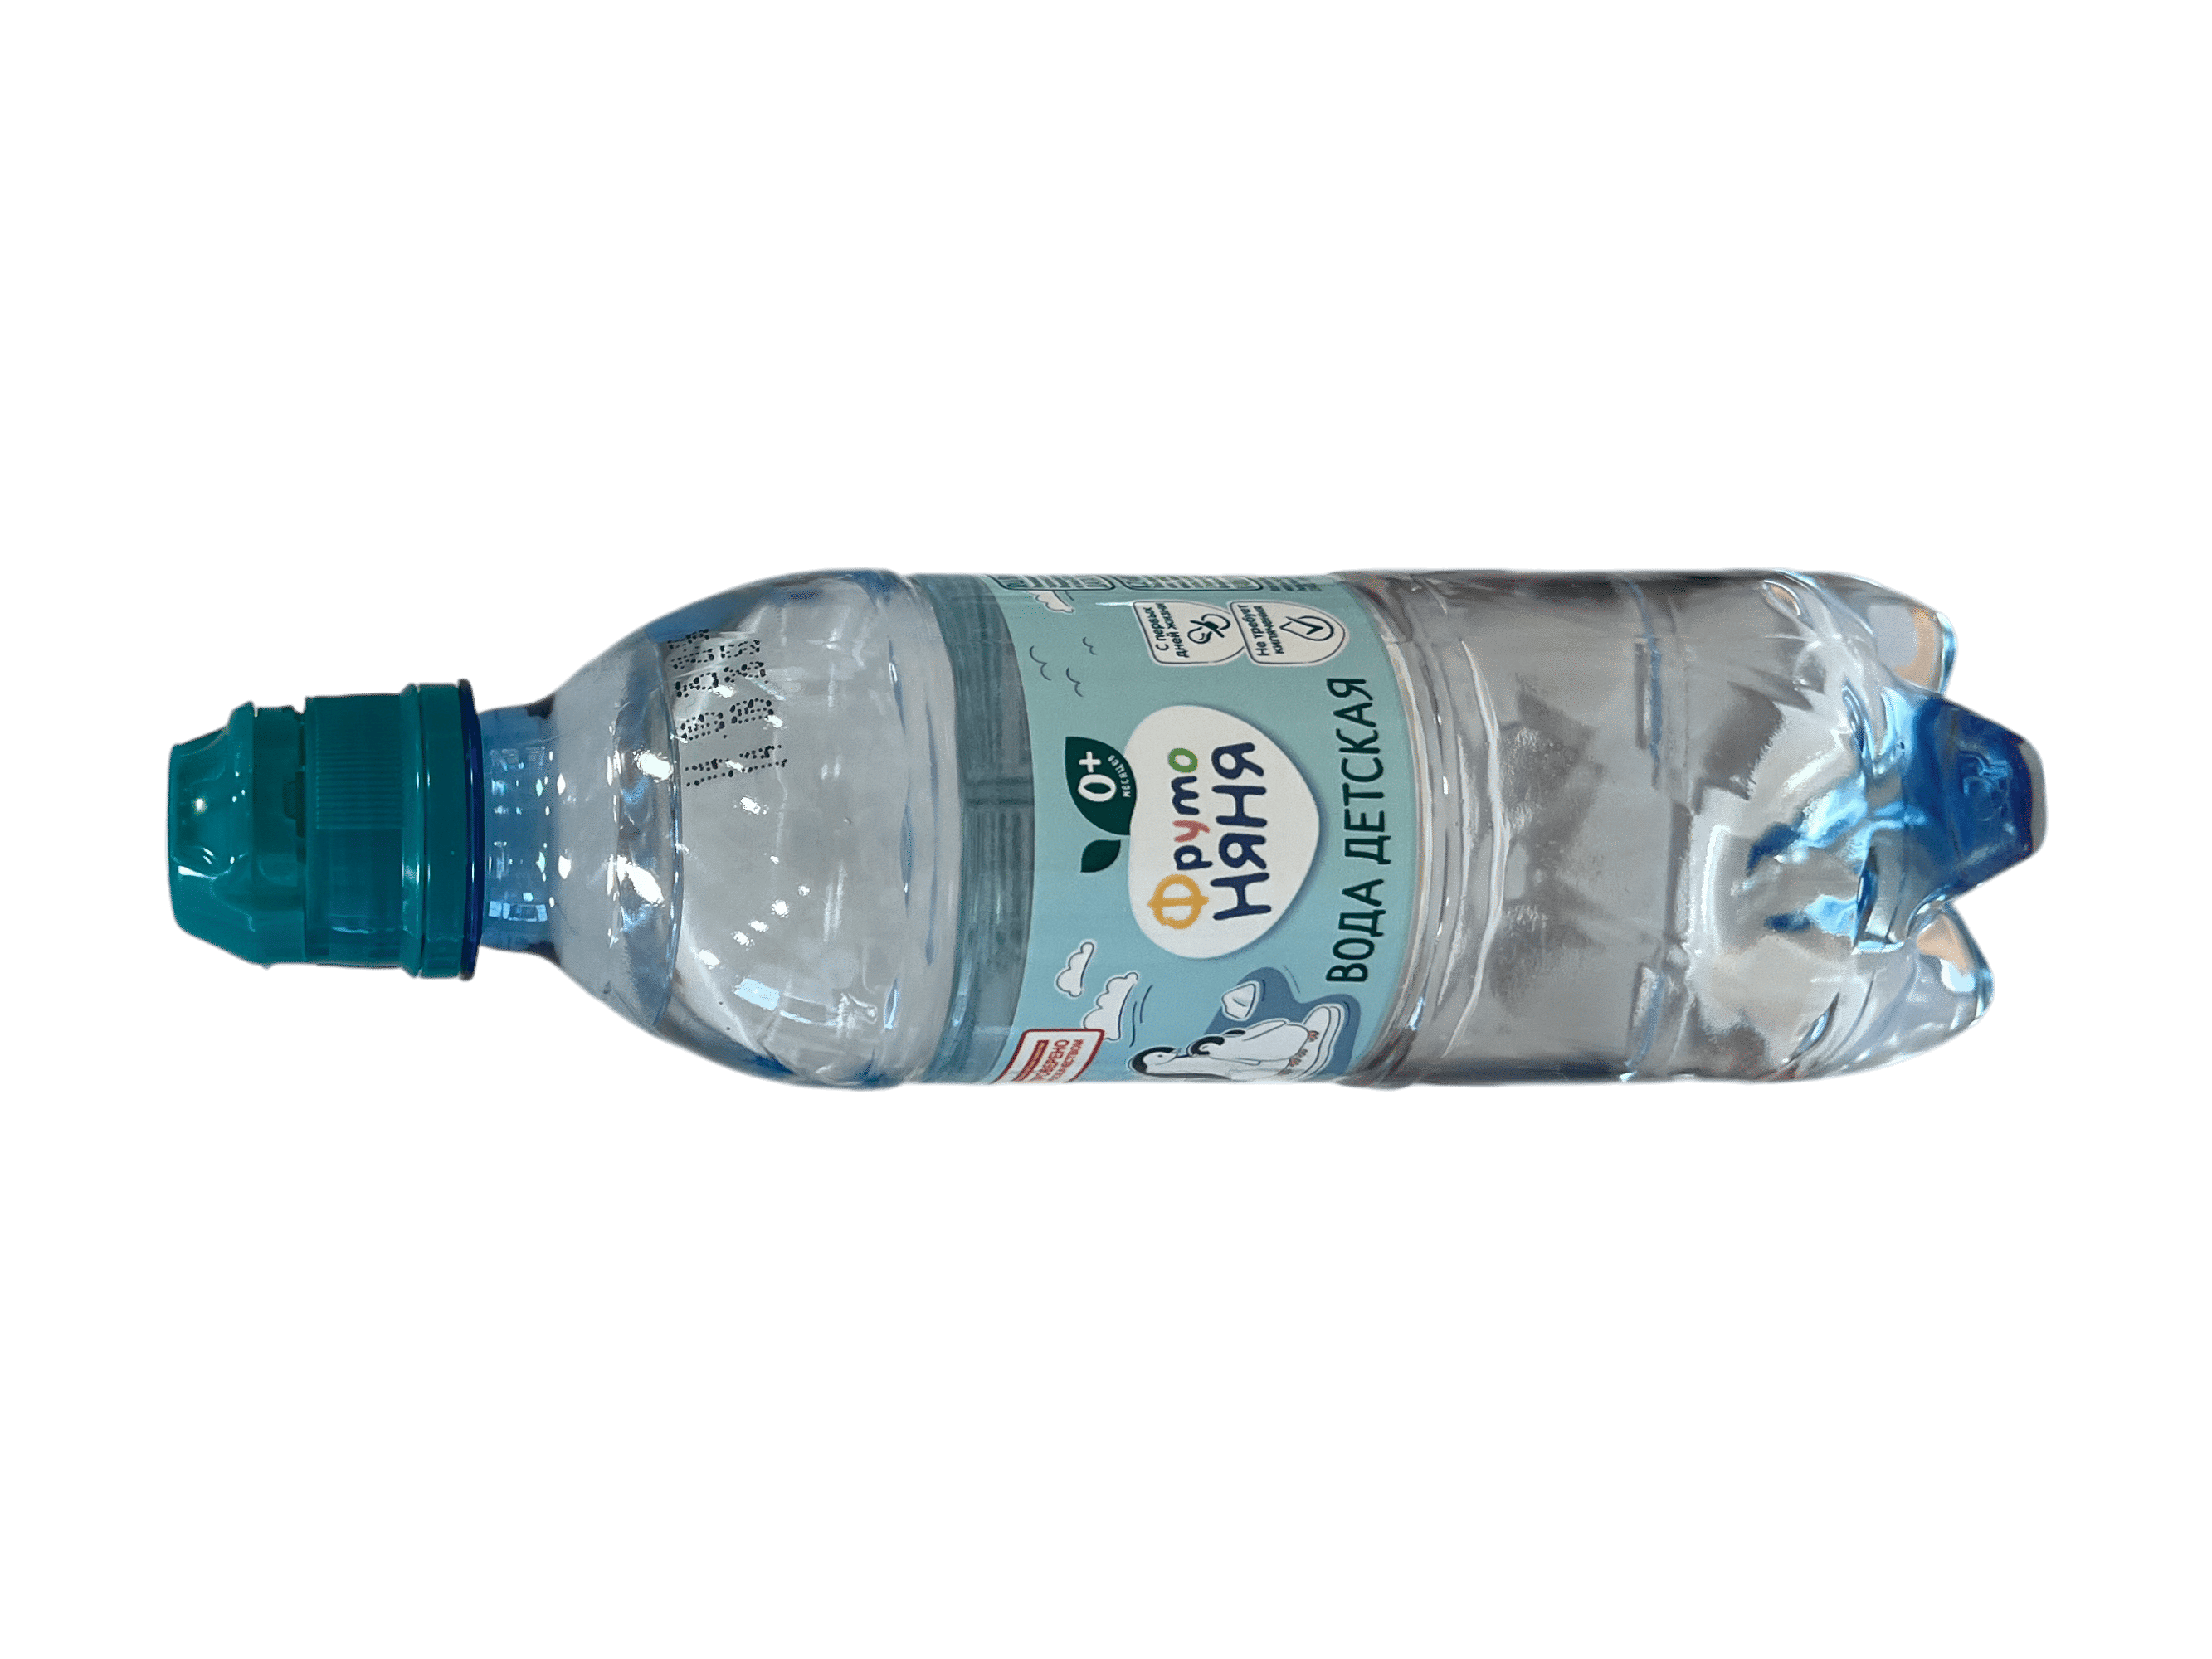
- Find a suitable product photo with a size of 400-700 pixels on each side (at least as much as possible);
- Crop the photo, leaving a small indentation from the edges, remove the background (you can use free editor);
- Rename each photo according to the product name (for example, «Non-gas water. with apple flavor»);
Adding new products in the personal account of telemetry
At this stage, you will need a personal account telemetry. If you don't have one, please send the registration details to the technical support department: full name, phone number, and email address.
After logging in to the personal account, select the «Products» tab in the sidebar. The product search bar and the button for adding new products are available on this tab.
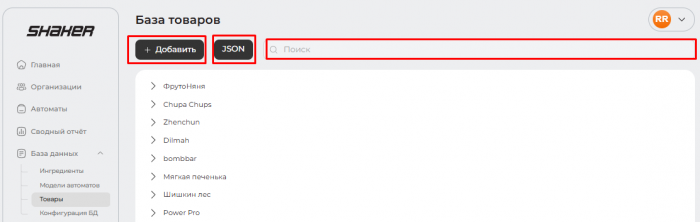
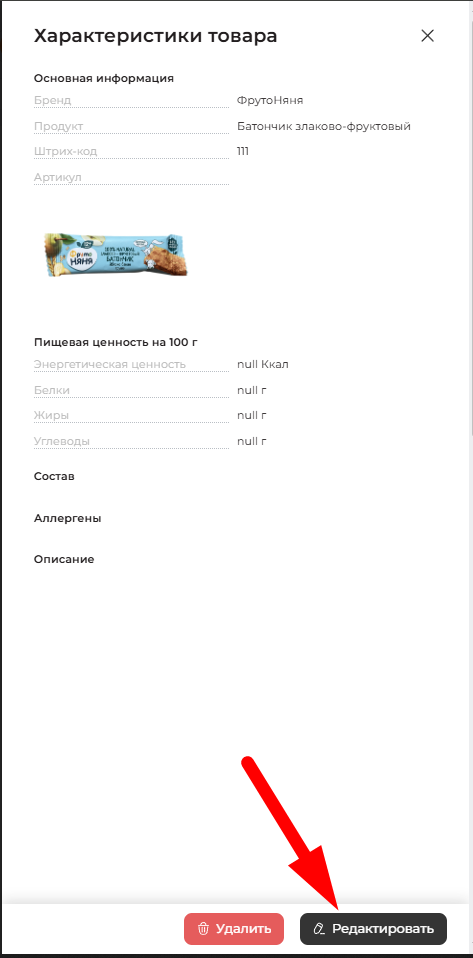
Click the «+Add» to add new products. Fill in the required fields:
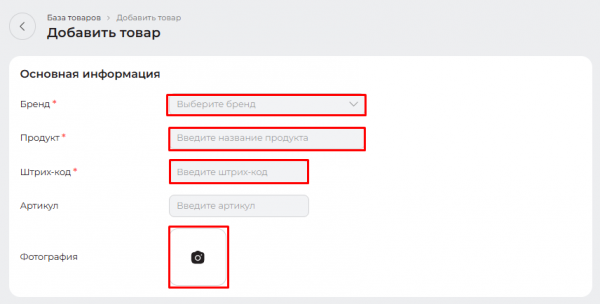
* The «Brand» field is the brand name of the product (if it is missing, you can create a new one);
- The «Product» field is the name of the product;
- Product barcode (can be customized);
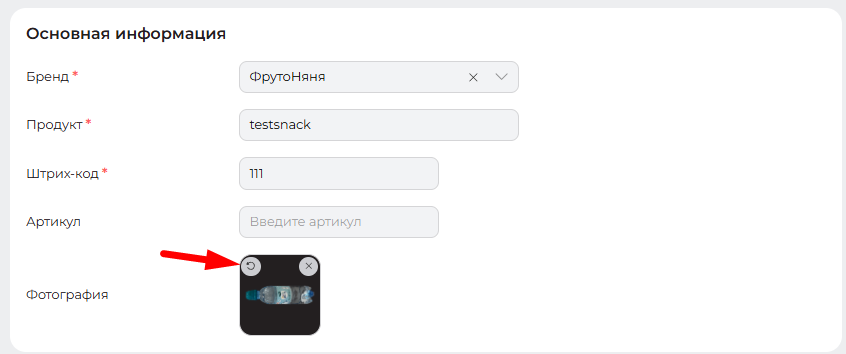
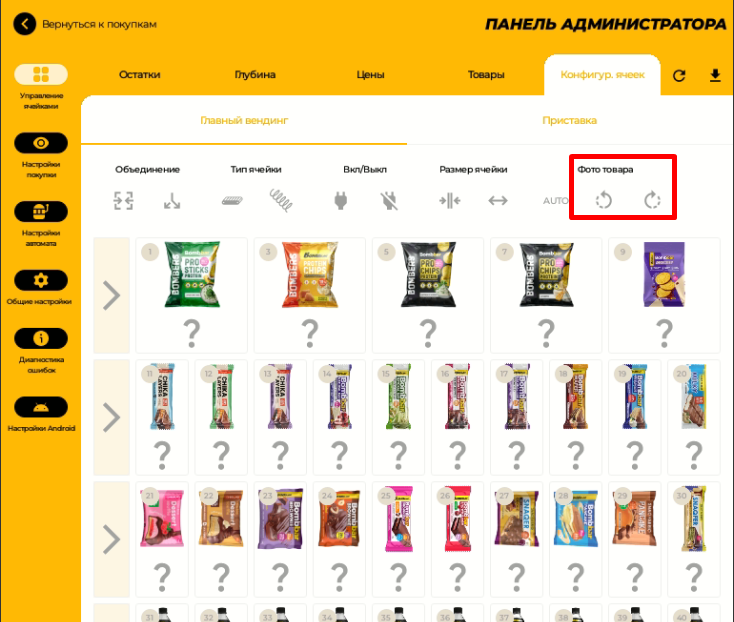
- Product photo - for correct display on the machine, you need to rotate the image correctly. Photos of bottles and long products turn to the left. You can rotate the image after downloading, if necessary, you can replace the image or flip it in edit mode of the product. The product photo can also be rotated on the machine screen after loading the database. Go to the Cell Configuration screen of the Cell Management tab.
- Click the «Add» button to save the product.
Updating the product database on the machine
- Make sure that the machine is connected to the Internet;
- Open the settings menu of the machine and log in as an admin;
- On the «General Settings» tab, under the «Update product list» line, click the WEB button, confirm the product update, and wait for the list to update.
—-
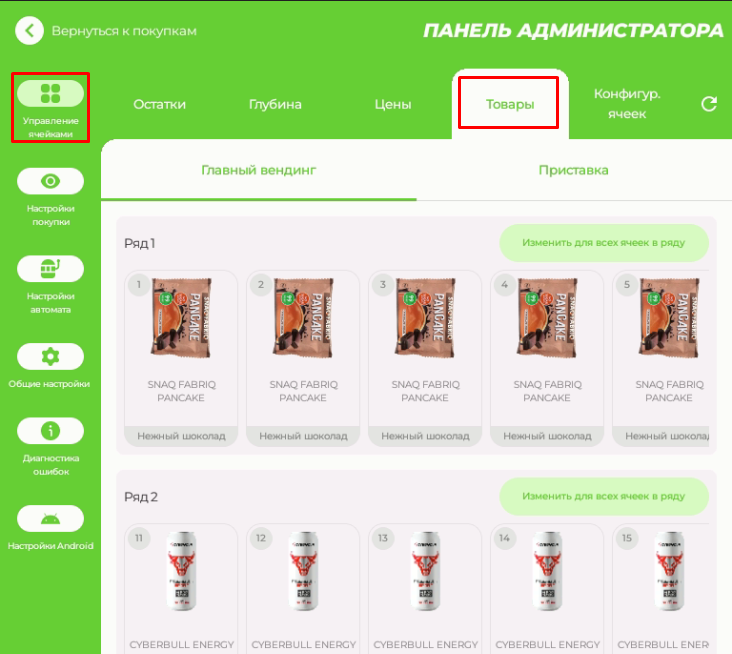
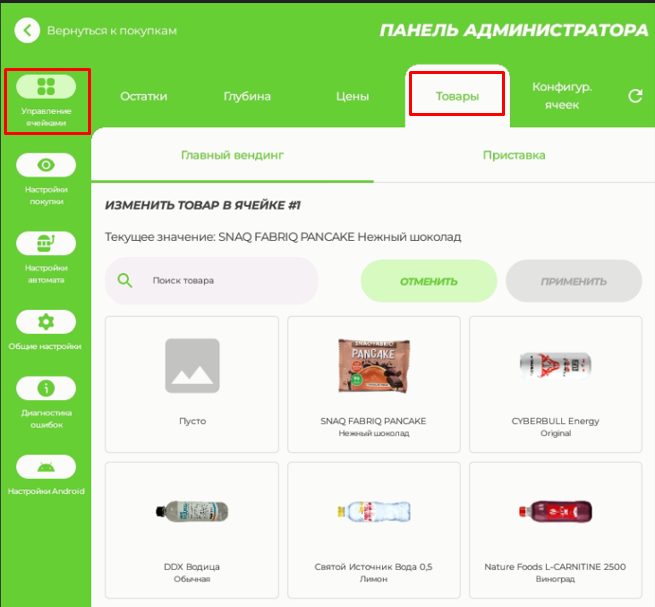
Changing the item in the cell
Open the section "Cell management" - "Products". To change the product in the cell, click on the desired cell and enter the product name in the search bar. Click the «Apply» button to save the settings.
Product price changes
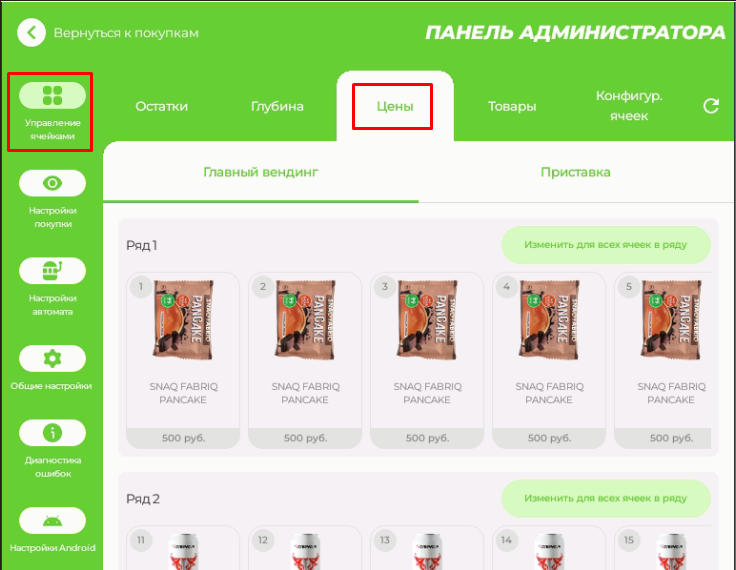
Open the section "Cell Management" - "Prices". Select the desired cell, enter the price, and click Apply.
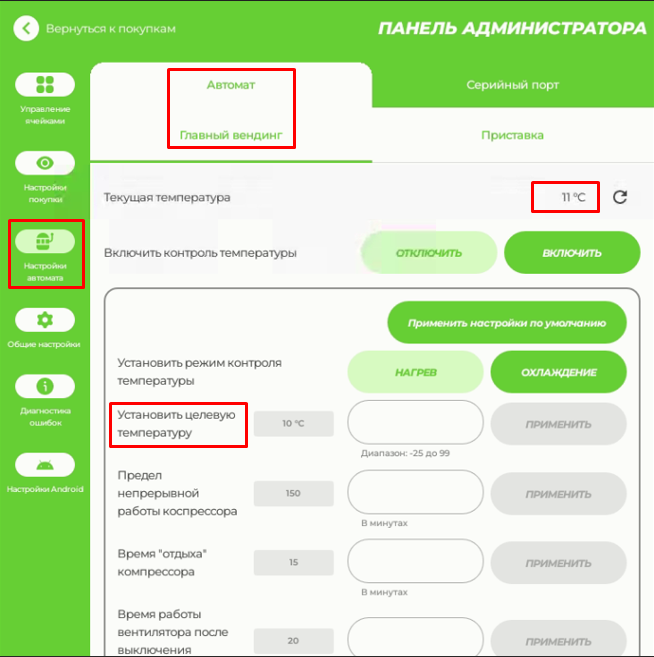
Temperature settings, backlight, optical sensor for product delivery
To monitor and change the temperature conditions, open the section "Automatic machine settings" - "Automatic machine". The screen displays the current temperature of the refrigerator compartment, as well as options for changing settings. IMPORTANT! The initial configuration of the cooling settings may not be suitable for the operating conditions of the device at the point. After starting sales in the first few days, check the temperature regime regularly and, if necessary, make changes to the cooling settings.
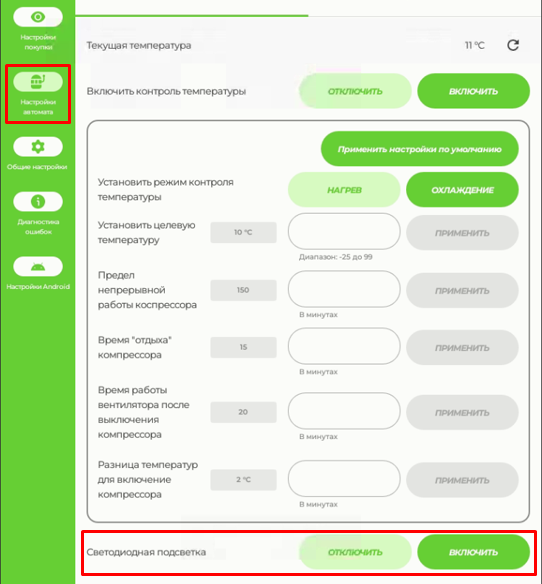
To turn off/on the backlight of the refrigerator compartment, use the option "LED backlight".
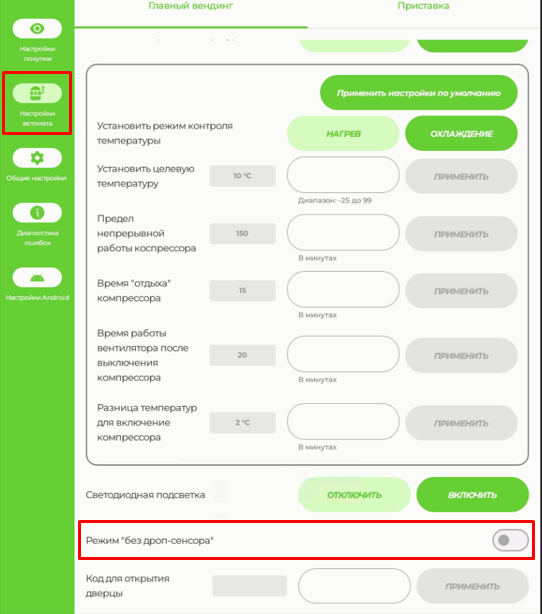
The optosensor is used to determine the delivery of goods from the cell. To turn on/off the pickup sensor, use the option "Mode without drop sensor" (off by default, this means that the sensor is on).
Payment device and purchase settings
Payment terminal settings
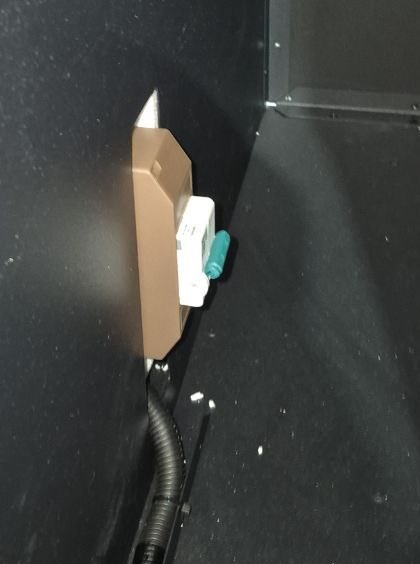
Connect the cashless payment terminal to MDB connector on the inside of the vending machine door. Go to "Machine settings" - "General" to edit the payment time and timeouts settings.
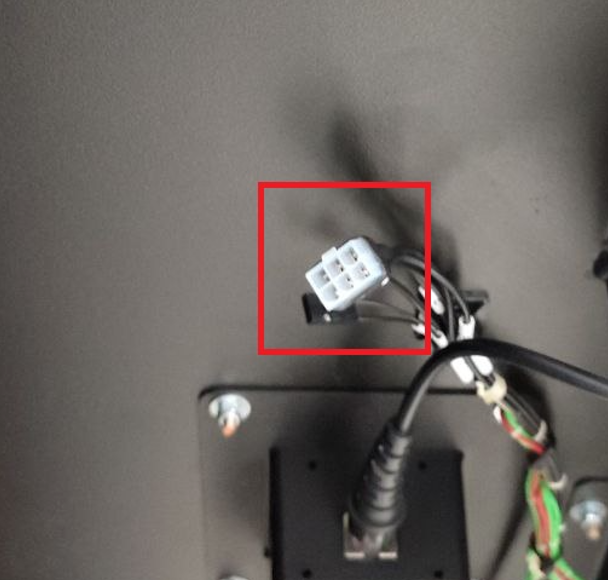
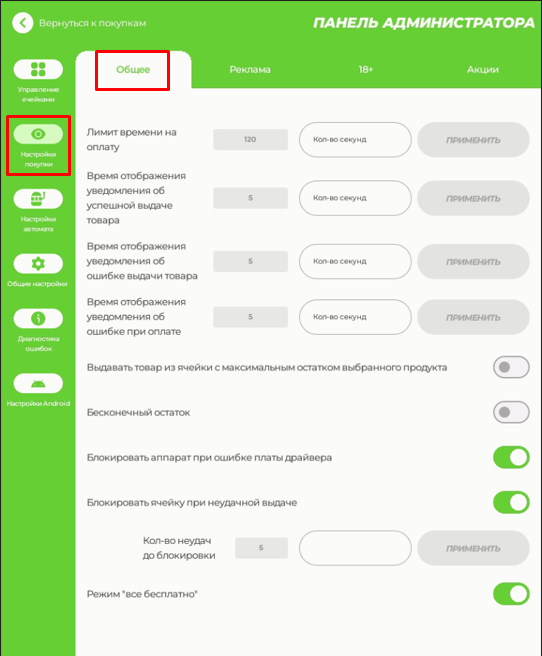
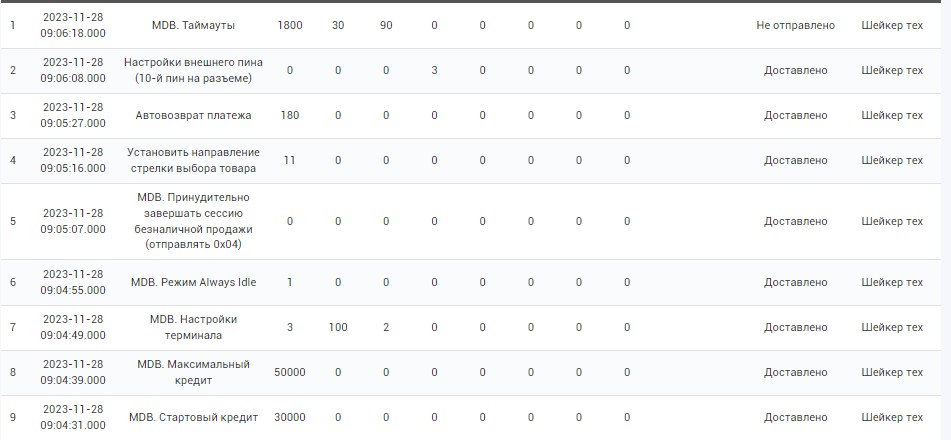
Payment by SMS (QR code) must be configured on the side of the cashless payment terminals. To enable SBP payment at the Vendista terminal, send list of commands to the terminal. Modification of the terminal cable is not required.
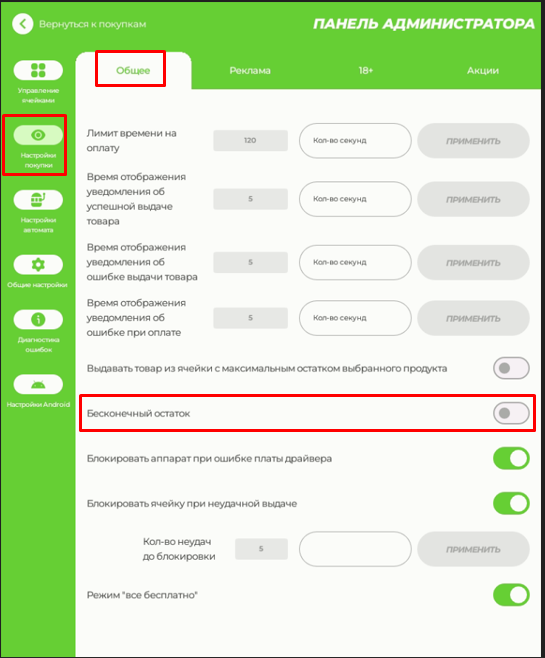
Disabling balance accounting
To disable balance accounting, use the "Infinite balance" option.
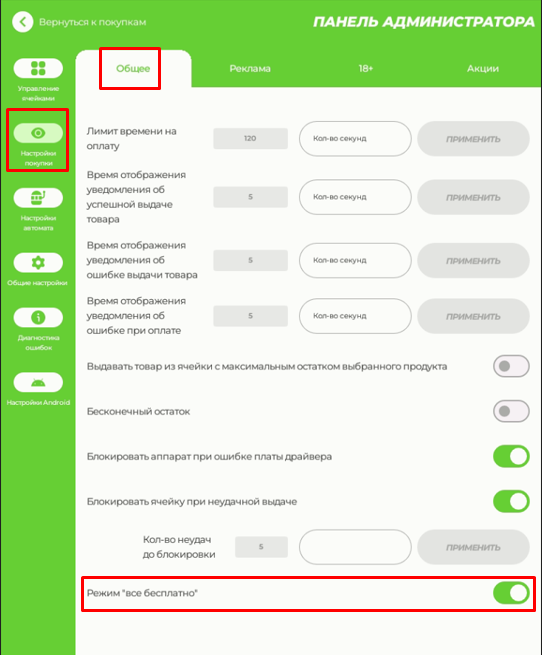
"Everything is free" mode
To enable the free delivery of goods, use the option "Everything is free". ATTENTION! By default, this option is active and must be disabled after connecting the payment devices. If the mode is turned off before the payment devices are connected, the purchase screen will be blocked with the error.
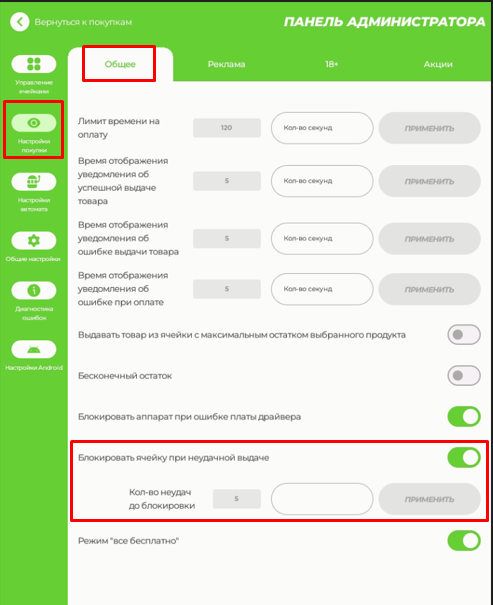
Setting up cell lock in case of unsuccessful issue
Option turns off the cell when the product has not been issued (the optometrist has not seen the product, the product has ended, or there is a problem with the delivery of the product. You can set the number of repeat issues before blocking.
Keyless access to the machine (opening the door lock by QR code)
Open the machine settings menu and go to the Machine Settings section. In the «Door opening code» line, type any number and letter code and click Apply. Open any QR code generator on the Internet (for example http://qrcoder.ru//этот) and generate a QR code from your code. Save the QR code to your device, and to open the door, show your QR code to the machine scanner. After successful reading, the lock will unlock, and an animation of the lock opening will appear on the machine screen.
IMPORTANT! The code from the machine's menu will stop working when the machine is connected to the telemetry. The new lock code can be obtained from the telemetry lock after registration.
Advertising module
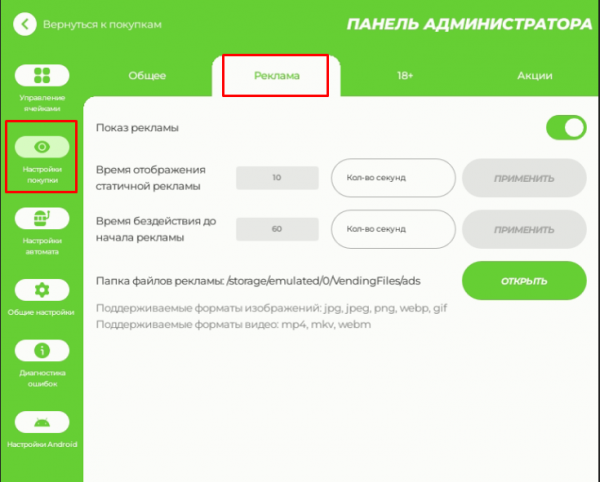
Upload the promotional materials to the vending machine folder: /storage/emulated/0/VendingFiles/ads. Supported formats:
- Images: jpg/jpeg, png, webp, gif;
- Videos: mp4, mkv, webm.
To set the timers for turning on the module and displaying it, open the «Purchase Settings» - «Advertising» section.
 .
Internet connection, remote connection setup
WiFi connection
Connecting a mobile modem
To connect, use the USB ports on the machine's PC.:
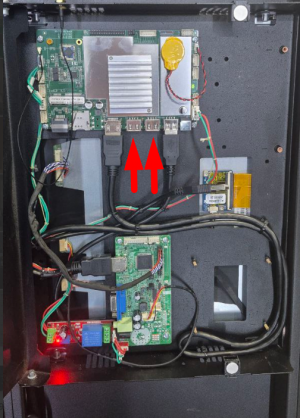
IMPORTANT! Do not place the modem inside the case, as this will greatly degrade the quality of communication. Place the device on a USB extension cable or connect the external antenna to the outside of the case.
Setting up a remote connection
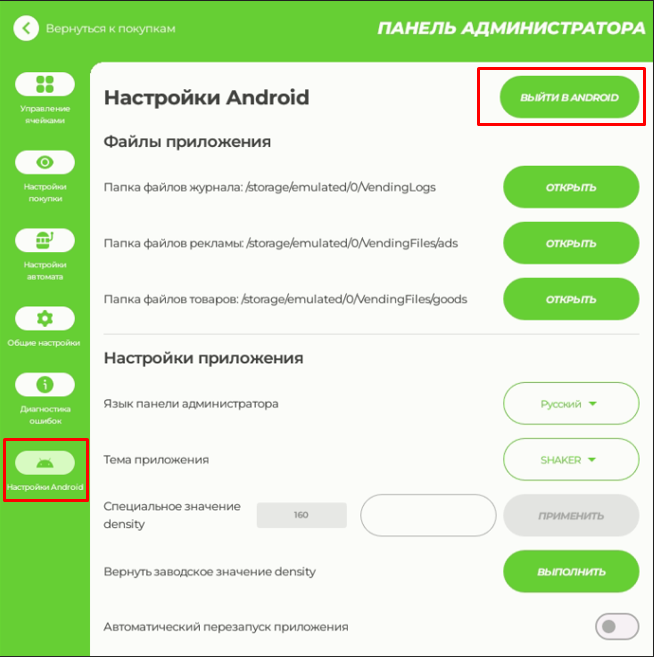
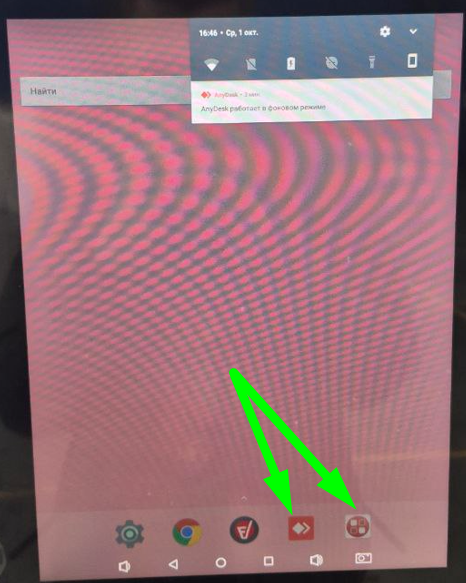
Open the "Android Settings" section and click «Log out to Android» to minimize the application. On toolbar, open AnyDesk or MoyAssistent programs. Request from Shaker Technical Support password for connection.
Software Update
To update the machine's software, leave a request to the technical support department. If there is no remote update option, request the installation file and copy it to a flash card. Further:
- Connect the flash card to the tablet's free USB port.
- Go to the android menu on your tablet.
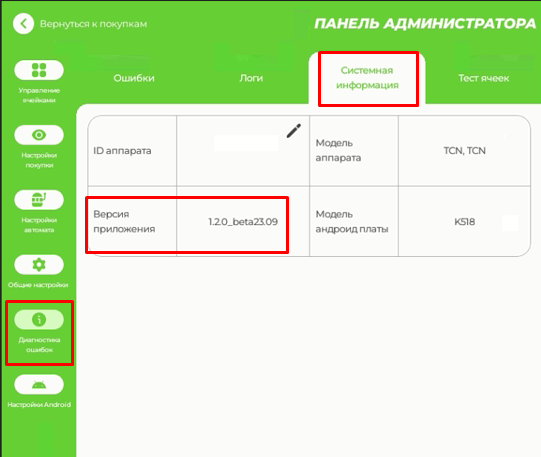
- Open the File Explorer, find your flash card, run the copied installation file. Open the app after installation. The version of the installed application is displayed in the Error Diagnosis - System Information section.
Verification of the age of the buyer for the sale of goods 18+
According to Russian legislation, the sale of 18+ goods (for example, energy products) is possible only if the age of the buyers is confirmed. The functionality of the vending machine allows you to enable age identification when purchasing via the Max messenger - read more in the manual Setting up customer age verification in Shaker Prime.
Errors, problems and their solutions
- Question: on the purchase screen, the cell is highlighted in gray (inactive). You can't buy from it. Answer: Check the rest of the cell's goods. Make a test issue and make sure that the cell is not blocked due to non-delivery of the product.
- Question: The product cell is not displayed on the purchase screen. It's not in the settings either. Response: Check the wiring harness connector for the cell motor. If the connector is in poor contact, the cell is turned off sale. Restart the machine and check if the cell has appeared. If there is no result after the reboot, leave a request to the technical support department to diagnose the machine.
- Question: part of the shelves is missing/cells. Checking the connectors of the shelves, cells and rebooting did not give results. Answer: Disconnect and reconnect the cell motor power connector, the shelf harness connector, and then update the shelf configuration in the Cell Configuration section. If the described actions did not help, please leave a request to the technical support department.
- Question: The machine dispenses several items from the slot when buying only one item. Answer: The cell motor needs to be replaced. Leave a request to the technical support department to diagnose the machine.
- Question: upon successful delivery of the product, an auto-refund occurs. What is the problem? Response: For regular returns, check the operation of the product pickup sensor. You need to make a withdrawal purchase and check if a refund is issued after the loss. Video of the output sensor check:
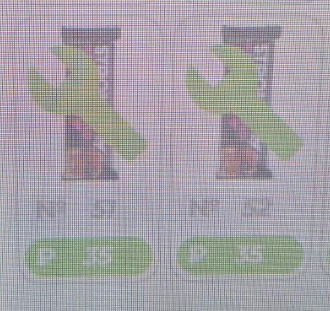
- Question: cell inactive, lit key icon . Answer: the cell is turned off programmatically after an unsuccessful issue. Open the Cell Management - Cell Configuration section, turn it on and check the product delivery.
- Question: Are there any restrictions on the height of the goods? Response: Yes, it is forbidden to use liter bottles.
- Question: at what height is it allowed to place bottles and cans of drinks? Response: plastic bottles can be placed on any shelf, w/b cans - no higher than 3 shelves.
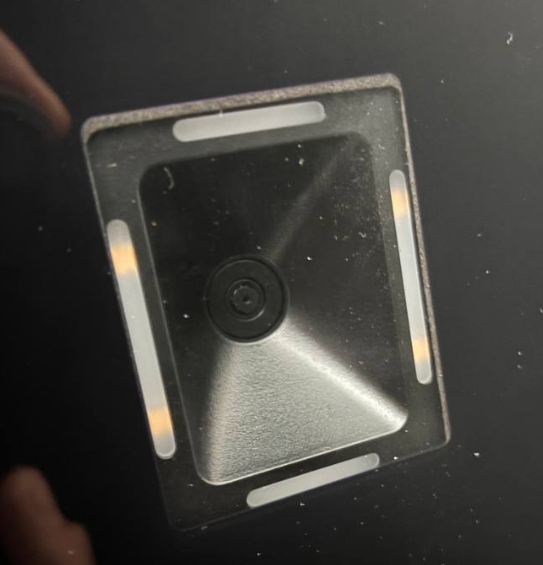
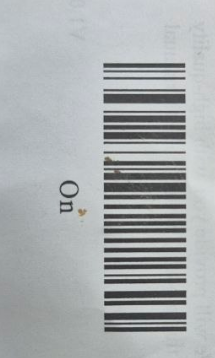
- Question: the code for opening the vending machine door from the settings menu does not work, what should I do? Response: check which code is entered in the machine settings and generate it again. Open the General Settings - Devices section - a serial port (WMC COM or CDC) must be assigned to the QR Code Scanner device. The port speed is 9600. Click the connection verification button in the scanner settings section and make sure that the device status is marked in green (running). Go to the Server tab and make sure that nothing is selected in the «Select a telemetry server» line. If the above did not help, reconfigure the scanner using QR/barcodes. To reset and adjust, you need to show the QR codes to the scanner. Different scanner models use different setting codes (click on the model name below to open the image).
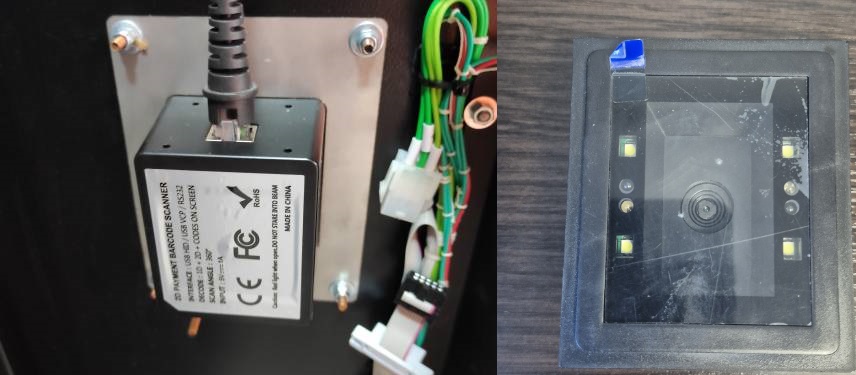
Setup procedure:
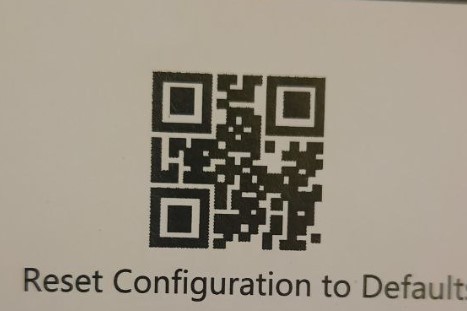
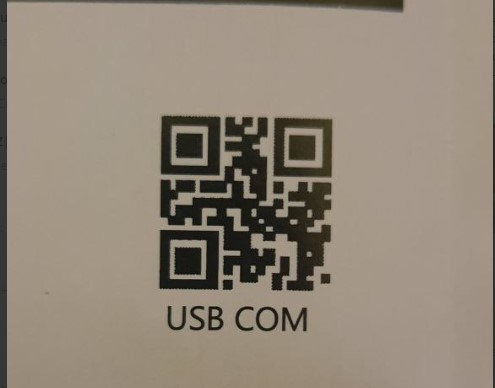
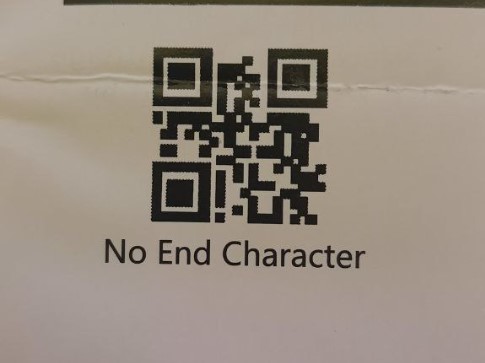
Restart the PC.

* QR Code with URL (for MAX verification)
Restart the PC.
- Question: Why are sales duplicated in the telemetry cabinet? Response: The machine clock is not set to the local time. Close the on-screen application using the service menu, open the android settings menu - General Settings - Date and Time. Change the time zone to yours, make sure that the «Use network time» option is enabled in the clock settings. Restart the machine and make a test purchase to check if there is no duplication of sales.